Customize your app
Theme
Check out Czan - Theme cuztomization documentation to learn how to customize your theme, including colors, typography, shapes, dark mode, and more.
App icon
Updating the app icon to reflect your brand identity is one of the first things you'll want to do.
Android
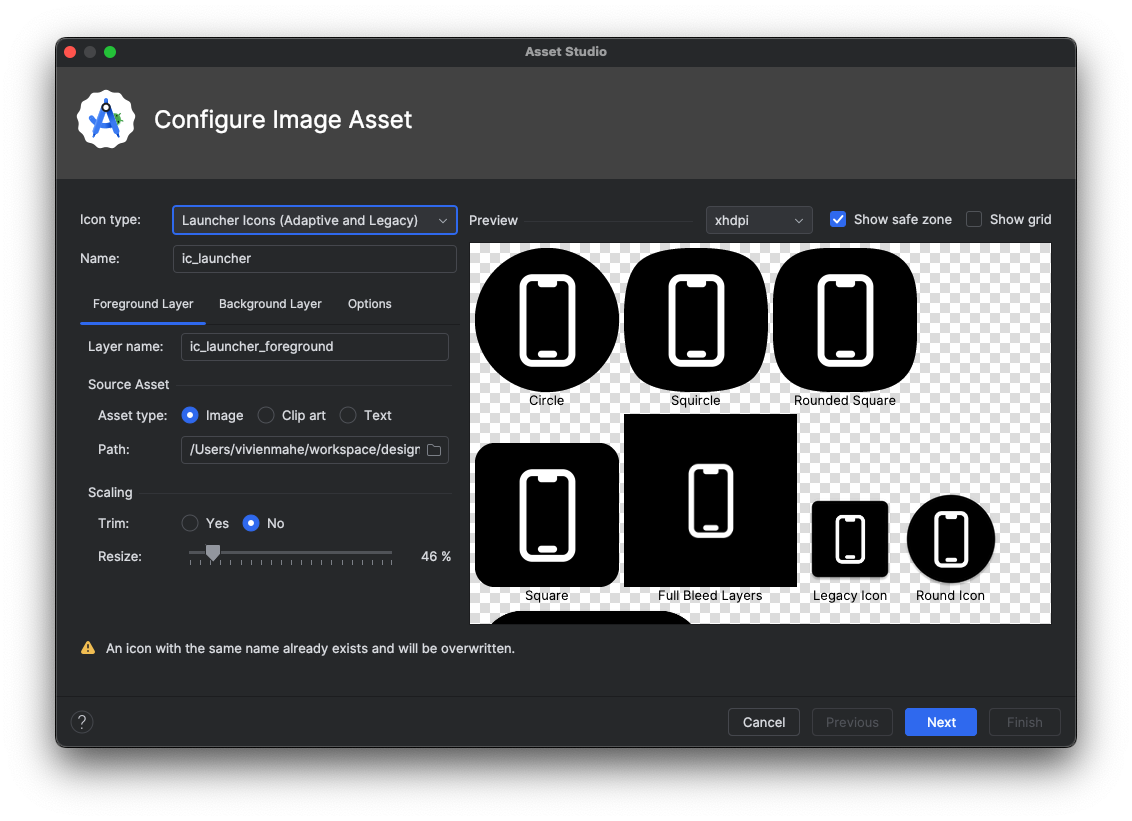
The easiest way to change the app icon on Android is by using Image Asset Studio in Android Studio.
Steps:
- Open Android Studio.
- In the Project view, right-click the
androidAppfolder. - Select New > Image Asset.
- In the Asset Type dropdown, choose either:
- Image (for a PNG file), or
- Vector (for an SVG file).
- Upload your app icon and configure the foreground and background layers.
- Optionally customize padding, scaling, and shape.
-
Click Next, then Finish. This will automatically generate icons in all required
mipmap-folders. -
Your app icon is referenced in
AndroidManifest.xml:
iOS
iOS uses an asset catalog (Assets.xcassets) to manage app icons.
Steps:
-
Prepare your icon assets in all required sizes. You can generate them using a tool like:
-
Open the iOS project in Xcode (
iosApp/iosApp.xcodeproj). -
In the Project Navigator, expand
iosApp > Assets.xcassets > AppIcon. -
Drag and drop the generated icon images into the correct slots in the AppIcon set.
-
Your app icon is referenced in your target’s Build Settings > Asset Catalog Compiler - Options > Primary App Icon Set Name.
![]()
Welcome screen
The WelcomeScreen is the first branded impression users will see. It includes a logo, a title, and a 2-line headline — all of which can be customized.
Logo
To change the logo shown on the welcome screen:
- Replace the XML file named
welcome_logo.xml - File location:
shared/presentation/src/commonMain/composeResources/drawable - Keep the same filename (
welcome_logo.xml) so that no code changes are needed.
Title
To change the main app title displayed:
- Open the
strings.xmlfile - Modify the value for the key:
Headline (2-line)
To change the headline text below the title:
- Still in
strings.xml, update the following keys:
These updates will be reflected automatically the next time you run the app.